Pattern hack: changing the neckline
- Sanne Goossens
- Jul 14, 2021
- 2 min read
Do you know the feeling that you just can't find anything in stores that really suites you? My mum has been struggling for a while to find some T-shirts she really likes, so I offered to make her some. We went fabric shopping together and she choose some really nice jerseys at a local fabric shop.

After she decided on the fabrics we had a look at some different patterns. She really wanted a T-shirt with a V-neck, but all the patterns I had were with a round neckline. So I decided I would just change the neckline off the pattern to a V-neck. The pattern I used is the Odette shirt by La Maison Victor. It is a simple T-shirt with the sleeves cut on the front an back pieces.
My mum has scoliosis so she prefers some room in the neckline. To reach this effect I decided to make 2 changes on the existing pattern. The first change I made was to lower the neckline by 3", to create a nice V-neckline. I also decided to open up the neckline with about 1/2", so I used a smaller seam allowance. My new neckline is the red line I drew and on the second photo I folded over the seam allowance to show the planned result.


I made the rest of the pattern as described, it came together really quickly. The next step was to create a binding that would fit nicely in the V-shape of the neckline. I measured the inside of the neckline of the shirt and cut the exact same amount for the binding. The fabric I used was really stretchy, so I didn't need to add a seam allowance. When I make binding for a neckline, I like to make it about 5% smaller to make sure it fits really snuggly. Because of the seam allowance and the little triangle I cut out, I realized the actual size would be about 2 inches smaller, so that would make up the 5% smaller size.
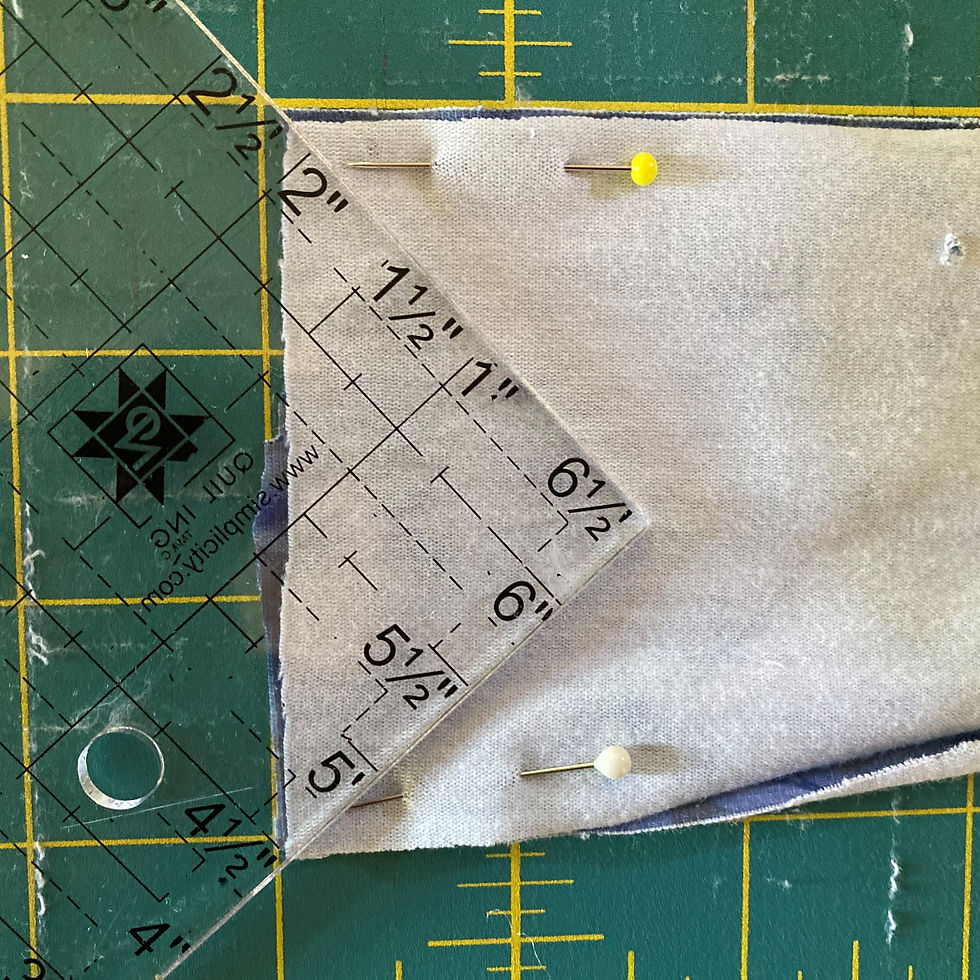
I folded the binding in half and cut out a triangle on the open side to create a V shape. To make sure I got an even shape I used the 90 degrees corner of a ruler and drew a line. I sewed the triangle with a 1/4" seam allowance and turned the binding right side out.


The final step was to sew in the binding, to try to get as sharp of a point as possible I used extra pins and it also helps if you start sewing at the point. Take is very slow in the V point. I had to unpick a few times with the first shirt but I got the hang of it by the second one.
My mum is very happy with the finished shirts, they fit her nicely. I played a bit with the different widths of the binding to create a bit of a standing up collar or a slim binding. I really loved changing the pattern so she would like it better, I think that is one of the best things about sewing your own clothes.


Comments